Subscribe For Some Easy to Make Weekly New Recipes!
Mini Cream Puffs Recipe
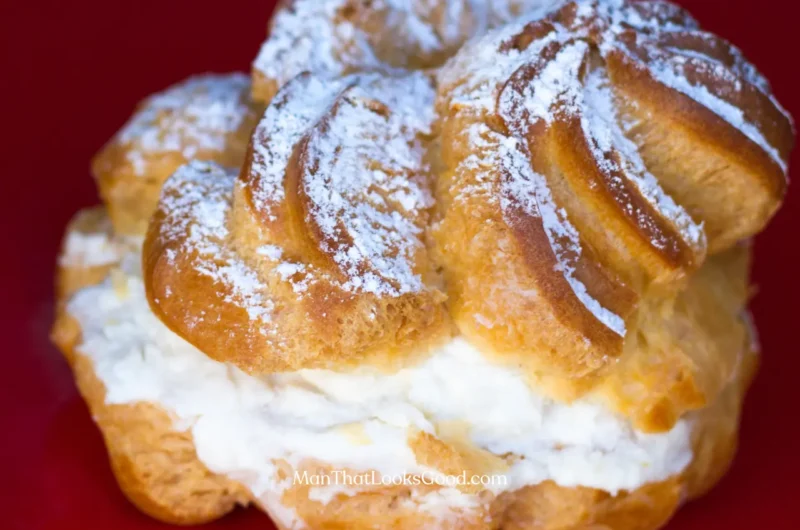
These Mini Cream Puffs are a sweet and delicious pastry with a touch of creaminess, I love making them during the holidays or when I gather family and friends.
I’m sure this Mini Cream Puffs recipe will be loved by many of you, They’re so crunchy with a nutty cream on the inside. I love enjoying one with a green smoothie, it’s one of my favorite dessert combos.
Usually, I make my Mini Cream Puffs with simple cream filling or sometimes with chocolate sauce when the kids want it. But this time, I tried something a little different by using Peanut Butter Whipping Cream. It was a new taste for me, but it was definitely good.
I’ve never used Peanut Butter Whipping Cream as a filling before, I usually use it just as a topping for my coffee at breakfast. But now, I’ll add it to my list of tasty fillings for sure.
What are Mini Cream Puffs?
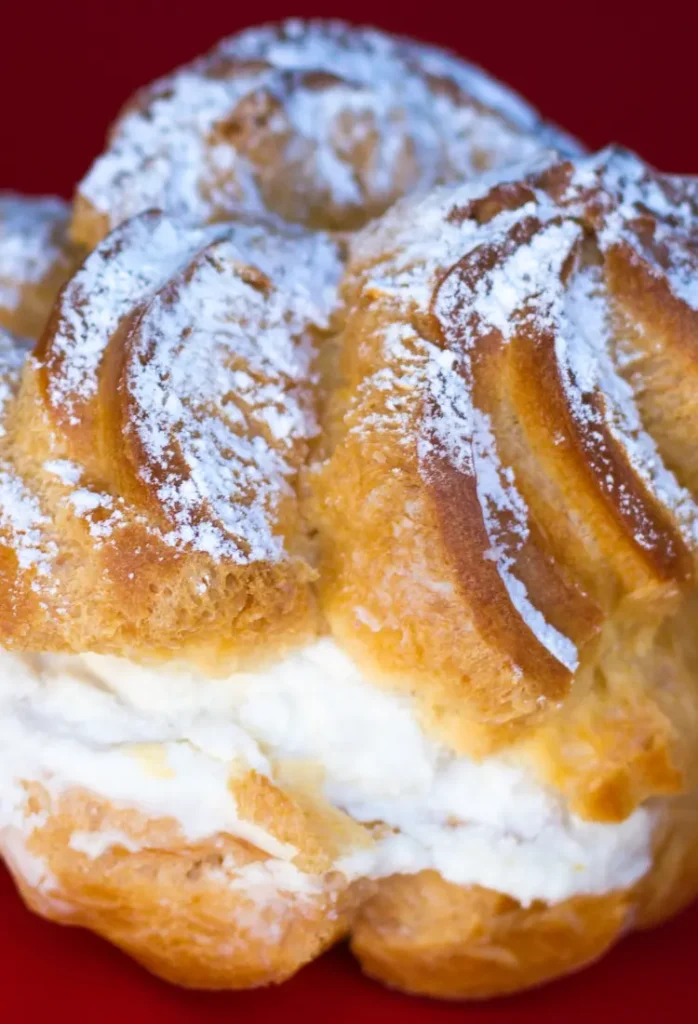
Mini Cream Puffs are delightful pastries made from airy choux pastry dough, which puffs up beautifully in the oven and filled with a variety of delicious creams, from classic whipped cream to nutty peanut butter cream, These mini cream Puffs are so perfect to be made and enjoyed in the holidays, at a family gathering, or when you desire a sweet snack, making them a fun and creative choice for home bakers who want to enjoy a homemade dessert that’s better than anything store-bought.
Ingredients
- 1/2 cup (120ml) water
- 1/4 cup (60g) unsalted butter
- 1/4 tsp salt
- 1/2 cup (65g) all-purpose flour
- 2 large eggs
- Peanut Butter Whipping Cream
- Sugar Powder (Optional)
Kitchen Equipment Needed
- Medium saucepan
- Mixing bowls
- Electric mixer (hand or stand)
- Piping bag with a round tip
- Baking sheet
- Parchment paper
- Spoon or spatula
How to Make Mini Cream Puffs?
Step 1:
Start by Turning on the oven to 400°F (200°C) and put parchment paper on a baking tray.
Step 2:
In a pot, mix water, butter, and salt. Heat it on the stove and stir until the butter melts.
Step 3:
Lower the heat and stir in the flour when it starts bubbling. Keep mixing until it looks like a big dough ball.
Step 4:
Take the pot off the stove and let it cool for a few minutes.
Step 5:
Now, Add one egg at a time, stirring well each time, until the dough turns so smooth.
Step 6:
Make small dough circles on the tray, you can use a spoon like I did.
Step 7:
Bake for 20-25 minutes until they are golden and puffy. Let them cool down before filling.
Step 8:
Cut a small hole in the side or cut them in half (It’s up to you).
Step 9:
Fill each puff with the peanut butter whipped cream using your spoon or a bag. Enjoy.
some Tips!
- You can make the puffs smaller or bigger (Depending on your needs), just remember to adjust the baking time a little.
- Of course, If you want different flavors, try using chocolate or vanilla whipped cream instead of peanut butter.
- If you don’t have a piping bag, You can use a plastic sandwich bag with a small hole cut in the corner.
How to Store Leftovers?
To keep leftover Mini Cream Puffs, put them in a container with a lid and put them in the fridge. They will stay good for 2 days. If you want to keep them longer, put the puffs and the cream in the fridge separately. Fill them right before you eat them.

What to Eat with Mini Cream Puffs?
As I said before my always first choice to enjoy these Mini Cream Puffs is with a green smoothie, A tropical fruit punch also complements them perfectly with its fruity sweetness. As we are now in the fall season, filling these puffs with Pumpkin Spice Whipped Cream is a great idea. They also go well with berry compote if you want some tartness in your meal.
FAQ
Can I use other fillings?
You can swap out the peanut butter whipped cream for regular whipped cream, chocolate ganache, or even Yuzu curd.
What if I don’t have an electric mixer?
You can whip the cream by hand using your whisk, but it will take more effort and time.
What’s the best way to pipe the dough?
I love to use a piping bag fitted with a large round tip. If you don’t have one, use a plastic bag with a small corner snipped off.
Can I make a gluten-free version?
Yes, you can use a gluten-free all-purpose flour blend as a substitute for regular flour.
How long does it take to make Mini Cream Puffs?
The entire process takes about 45 minutes to 1 hour, including preparation and baking time.
Conclusion
This is a lovely Mini Cream Puffs filled with Peanut Butter Whipping Cream, a nice creamy pastry dessert to enjoy. Fun to make and delicious to eat. Give them a try, and don’t forget to share this recipe with others, be sure to subscribe to my blog for more Cream Puffs recipes like this one.
Mini Cream Puffs Recipe
Course: DessertCuisine: French, AmericanDifficulty: Medium12
Mini Cream Puffs25
minutes25
minutes150
kcal50
minutesMini Cream Puffs are light, airy pastry rounds filled with fluffy peanut butter whipped cream, perfect for a sweet and creamy dessert.
Ingredients
1/2 cup (120ml) water
1/4 cup (60g) unsalted butter
1/4 tsp salt
1/2 cup (65g) all-purpose flour
2 large eggs
Peanut Butter Whipping Cream
Sugar Powder (Optional)
Directions
- Start by Turning on the oven to 400°F (200°C) and put parchment paper on a baking tray.
- In a pot, mix water, butter, and salt. Heat it on the stove and stir until the butter melts.
- Lower the heat and stir in the flour when it starts bubbling. Keep mixing until it looks like a big dough ball.
- Take the pot off the stove and let it cool for a few minutes.
- Now, Add one egg at a time, stirring well each time, until the dough turns so smooth.
- Make small dough circles on the tray, you can use a spoon like I did.
- Bake for 20-25 minutes until they are golden and puffy. Let them cool down before filling.
- Cut a small hole in the side or cut them in half (It's up to you).
- Fill each puff with the peanut butter whipped cream using your spoon or a bag. Enjoy.
Notes
- You can make the puffs smaller or bigger (Depending on your needs), just remember to adjust the baking time a little.
- Of course, If you want different flavors, try using chocolate or vanilla whipped cream instead of peanut butter.
- If you don’t have a piping bag, You can use a plastic sandwich bag with a small hole cut in the corner.

